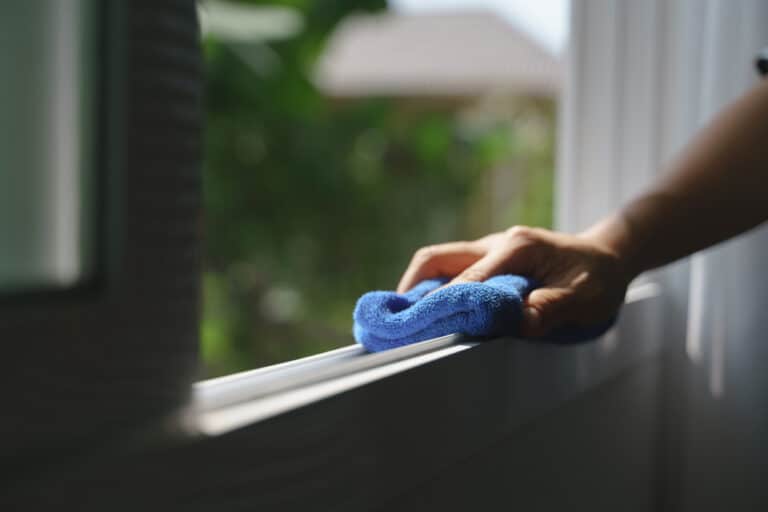
Looking for ways to give your house a nice but inexpensive makeover? Then you might want to know how to paint window frames. Since they are in almost every room in your home, the touching-up of frames will give your house a rejuvenated look which nobody would fail to notice.
Apart from that, neatly painted windows stand out from the walls surrounding them, thereby giving the room in which they’re installed a nice contrast. On top of that, a new coat of paint can help the window withstand wear and tear for years to come.
How to Paint Window Frames?
Here are the steps using which you can paint window frames:
Part One: Preparing the Frame for Painting
Step 1: Put a newspaper below the window frame
As you’ll start painting the window, excess paint would inevitably start falling. Also, as you’ll see in the subsequent steps, you need to scrape off the existing paint before applying a new coat. Having a newspaper down will save you a lot of time in the future as you won’t have to do any vacuuming.
Provided you can’t find an old newspaper for the task, you can also use a worn-out towel that you have no plans of using again.
Step 2: Scrape off the old paint
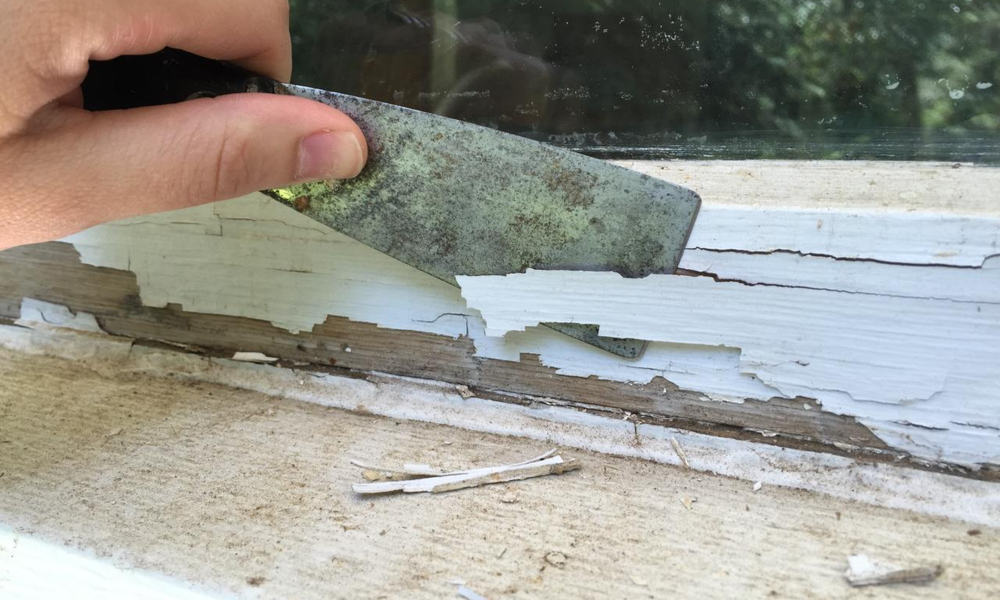
Dig the edge of the scraper into the paint and then start pushing down while pressing firmly against the frame. Avoid putting too much pressure if the scraper gets too close to the windowpane – or else you might end up scratching the pane.
Step 3: Use spackling putty to fill in holes
Once you’re done scraping, you might notice the presence of holes where previously the paint was. These holes need to be filled. Otherwise, the new paint won’t hold for much longer. Using a scraper, fill the holes with putty just the same way as you use a knife to spread butter.
Step 4: Use 240-grit sandpaper to sand down the frame
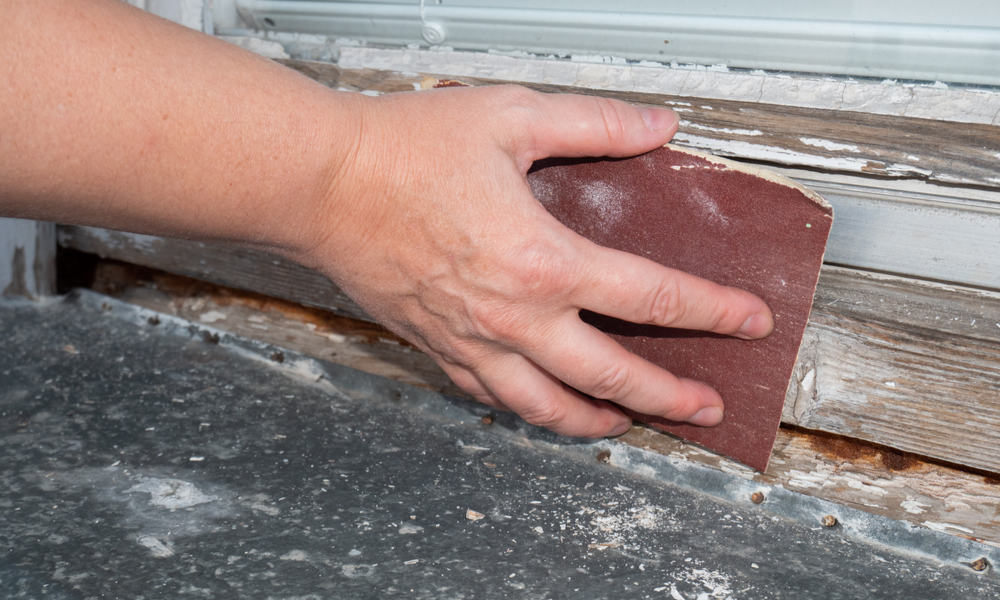
There are two reasons why we recommend you sand down the frame. First, it will help the paint stick quickly as you apply the coat. Secondly, since sanding evens the surface, it will become easier for you to paint the frame.
Tip: One excellent technique to sand is to rub the frame in long, smooth strokes gently. Avoid short, quick strokes at all costs.
Step 5: Remove debris off the frame using a brush
Although you’ve scraped and sanded down the frame by now, plenty of small bits of wood, paint, and even metal are still not letting go of the frame. You cannot leave them there as they would interfere with the fineness of the new coat.
To remove the debris, brush it off the frame. Use a clean paintbrush with hard bristles so that you can get rid of the fragments in quick succession. Don’t ignore the corners as multiple pieces of paint (and maybe even wood) might still be clinging onto there.
Part Two: Painting the Window Frame
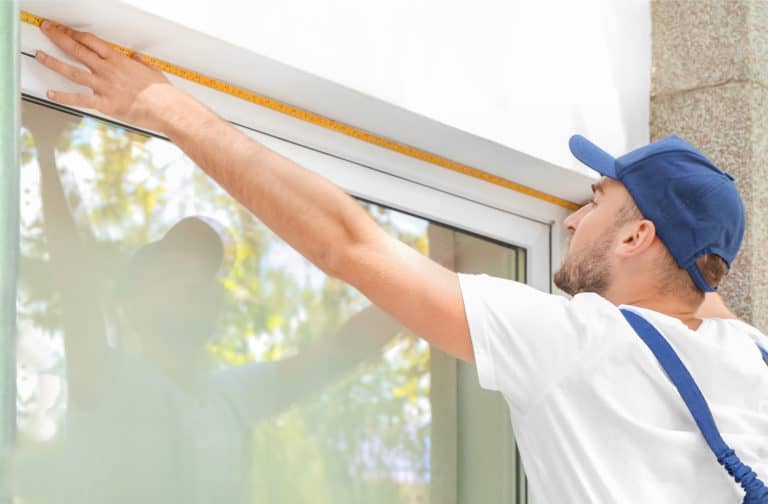
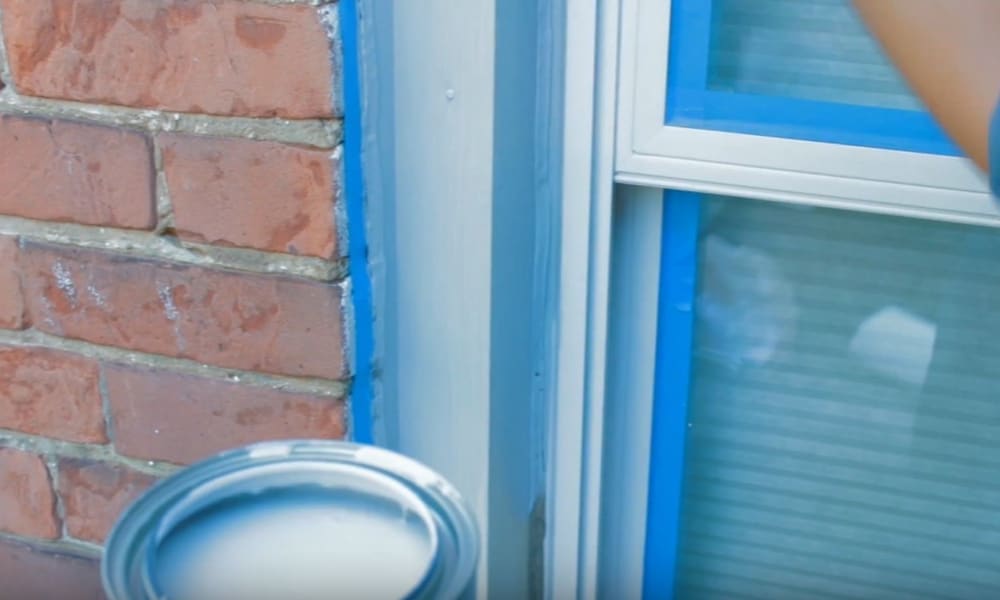
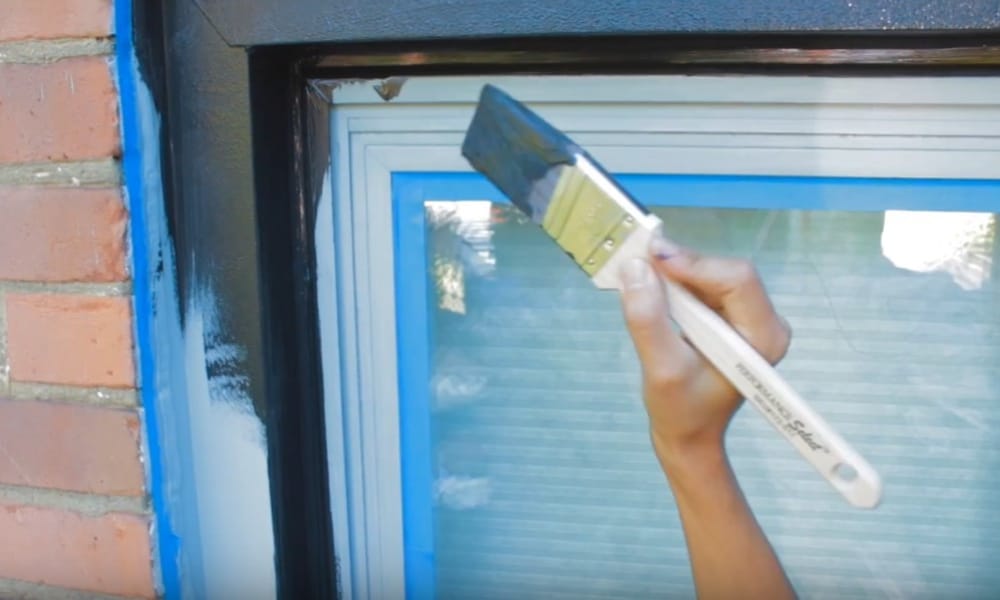
Step 6: Circumscribe the frame with a painter’s tape
As you begin laying painter’s tape around the four sides of the window, start at the top. Then cover both the left and right-hand sides before laying the tape at the bottom. Make sure that the distance between where the frame ends and the tape starts is at least 0.2 centimeters. As that would automatically ensure that no area of the frame is hidden under the tape.
Also, there’s no compulsion which states that you can only use the painter’s tape. If you cannot find it, you can use masking tape as well. Any sticky tape which would let you trace the outline of the frame would work fine.
Step 7: Apply the oil-based primer
Oil-based primers help create a better bond between the surface-to-be-painted and the paint itself. Use a 5.1 centimeter angled brush to apply the oil-based primer onto the frame.
Use long flowing strokes to apply the coat of the primer on the frame’s area you’re trying to cover. Make sure that once you’re done applying the primer, corners of the frame, as well as other hard-to-reach areas, have also been taken care of.
Step 8: Let the primer dry
Depending on the weather conditions out there, the primer might take as little as 3 hours – or as much as half a day – to get fully absorbed by the frame. If you’re in a hurry, you can turn on the ceiling fan to help the primer dry quickly.
Don’t start applying the paint if the primer is still wet. Or else, the frame might not be able to hold the paint for long.
Step 9: Apply the paint
Depending on the type of window you might be painting, you might have to adopt a different painting method. Though the brush (5.1 cm angled) will be the same.
For instance:
- If you’re going to paint a sash window: Paint the bottom layer of the frame first. After it becomes dry to touch, rotate the frame, and paint the second one. In this way, keep on rotating the frame until you have covered all sides.
- If you’re going to paint a casement window: Paint the entire frame at first. Once it is dry to touch, finish with the sill.
Step 10: Final step
Remove the painter’s tape marking the perimeter of the frame. Detach it gently to avoid leaving any marks on the wall. Then let the frame dry for at least 24 hours during which nobody in your home should touch it. Even if you want to apply another coat, you should still wait for the first coat to dry before applying a thicker coat.
Conclusion
There are multiple steps (prepping the frame, scrapping the worn off paint, applying the oil-based primer and new paint, among others), which you’d have to execute perfectly to give your frame that look that will make it the center of the attention in your room. Just follow the instructions given above, and there’s no reason why you won’t be able to achieve the results that you desire.
If you have any questions about the process, please feel free to get in touch.